|
The stereo begins with the headunit which is a Clarion ProAudio DXZ835MP. It
features AM/FM/CD/MP3. I chose it because it looked like it would match the
interior nicely, which it does. Particularly the lighting can be adjusted to
specifically match the Mercedes orange interior lighting. I also wanted to be
able to use MP3 CDs so that feature was a plus.
|


|
|
From the headunit, the signal is sent to two Phoenix Gold Amplifiers. The 4
channel amp is the Tantrum 600.4 which puts out about 75x4 wRMS at 4 ohms
stereo. This amp drives the interior speakers. The low end is powered by a
Phoenix Gold Tantrum 500.2 which is bridged and puts out around 550 wRMS at 4
ohms Mono
|

|
|
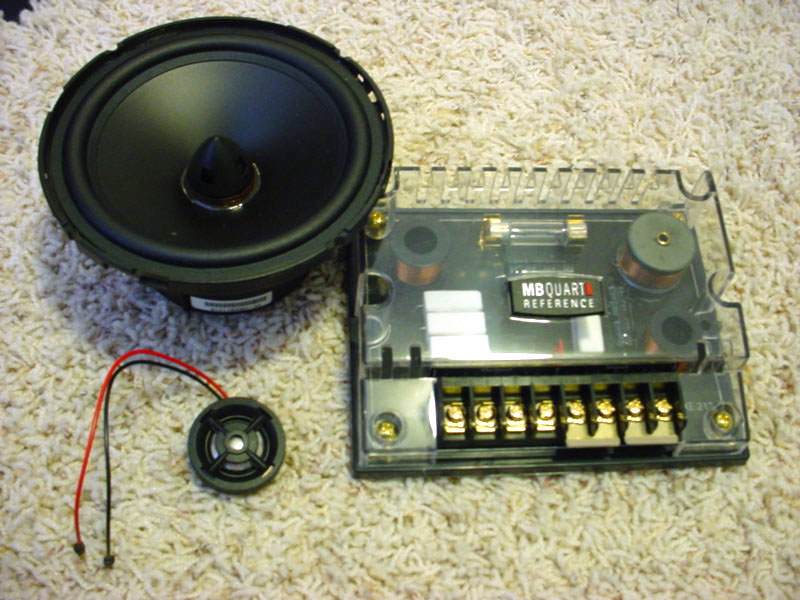
The PG T600.4's power is driving an MB Quart Reference Series RCE213 Component
Set. The set features a 5.25" mid-range and a .75" tweeter. They are mounted in
the stock locations. Look below for the installation pictures.
|
 
|
|
Finally, the bass comes from two 12" Alpine Type R subwoofers mounted in a
custom enclosure in the trunk. They are driven by the PG T500.2.
|

|
|
The install started with as an idea to give it a custom appearence, but but
maintain as much cargo area as possible, and retain access to the spare tire,
tools, and the battery. This would of course make the design more complex, but
be better in the end. I started by making a template of a cross section of the
trunk so I could draw it out on the wood. I used a large piece of cardboard and
kept shaping it until it fit perfectly in the trunk. I then traced it on to the
piece of wood, and started cutting away at it. After a few sanding jobs and
alterations, it was a nearly perfect fit in the trunk. From there, I put 2 1
cubic foot boxes on the back of it to give the woofers a cabinet. Finally I
carpeted the enclosure (as seen in pictures below)You can see the box design in
the two pictures. The second picture was a test fit.
|


|
|
Next, I began construction on part of the false floor that would be comprised
of the two amplifiers, wiring and the cross-overs. The smaller crossover
section was first. I, again, used cardboard to determine the main design. I
used .75" MDF for the base, and .5" MDF for the top. The top is removable in
case I want to remove anything or change any settings. It was a very tight fit
to get the crossovers into such a small area, but it was accomplished
|


|
|
Finally, I began construction of the larger false floor where the amplifiers
are sunken into. I started by making the bottom rack part that the amplifiers
would screw onto and where the wiring could be run. It rests on two fore/aft
running supports that the original trunk floor rested on. I used .5" MDF to
decrease weight as much as possible, and to give some extra room in the trunk.
|


|
|
I finally topped it off with a baffle piece that fit flush in the trunk. I
carpeted it with the closest match of carpeting from a local store. This
yielded a custom looking, but subtle install that still allowed the trunk to be
usable and allowed access to essential items.
|


|
|
I wanted to keep the interior stock looking for the most part, so I knew this
meant installing the tweeters in the factory locations. Upon inspection, this
wasn't going to be as easy as I thought. The stock tweeter grilles had the
tweeters actually mounted in the grille. This was going to take some custom
work. The first picture on the right is what the tweeter grille looked like
before. After a few quick zips with the dremel, it looked more like the second
picture.
|


|
|
Next, I had to figure out a way to mount the tweeter in the same location. I
ended up using a piece of scrap ABS plastic that I had laying around. I cut it
out, and drilled a hole to fit the tweeter. I secured it by screwing the
factory vent-louver screw through it, as seen in the pictures.
|


|
|
After all said and done, I popped the factory grille back on, and there it was,
looking stock.
|

|